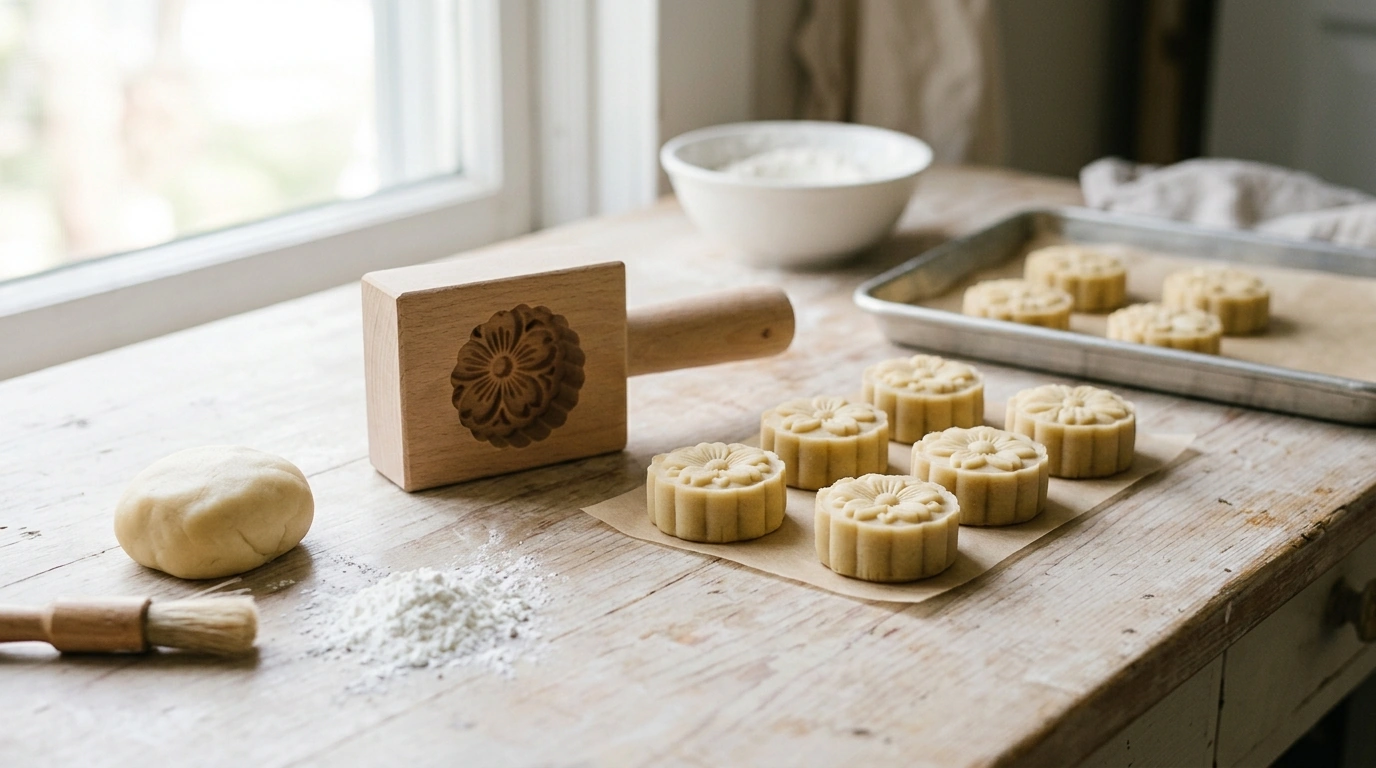
Small treats feel special when the shape is sharp, the pattern is centered, and every piece releases cleanly. Our mini jelly mooncake cookie press mold set is built for that moment—when jelly mooncakes, pressed cookies, fondant toppers, or pastry accents need a floral finish without fussy hand-carving. Use it for quick batches, party trays, gift boxes, and holiday bakes where consistent size and detail matter.
When you want repeatable results, the tool matters as much as the recipe. Our team reaches for a compact press mold set like this when the goal is “same size, same imprint, clean edges” across an entire tray.
Clean imprints come down to one thing: using the mold when your mixture is at the right firmness. Too warm smears; too dry cracks; too sticky clings. The sweet spot is “pliant, smooth, and cool.”
| Mixture condition | What happens | Simple fix |
|---|---|---|
| Too warm/soft | Pattern looks shallow or smears | Chill 10–20 minutes; dust lightly before pressing |
| Too dry/crumbly | Edges crack; incomplete imprint | Rest dough; add tiny amount of liquid/fat if recipe allows |
| Too sticky | Sticks to stamp face | Dust stamp lightly; press and release in one clean motion |
| Too firm/cold | Hard to press; uneven edges | Let sit a few minutes at room temp, then press |
If you want every piece to look like it came from the same bakery box, treat the press step like a quick routine instead of an improvised “stamp and hope.” This is the workflow our team uses to keep patterns centered and edges crisp.
Fine floral grooves do their job best when they’re clean. Wash promptly so sugar and starch don’t dry into the lines, and dry fully before storage. For general, trusted guidance on food-contact materials and safe cleaning basics, you can reference the U.S. Food & Drug Administration (FDA) on Food Contact Substances and the USDA FSIS basics for cleaning and sanitizing.
| Treat moment | What to pair | Why it works |
|---|---|---|
| Afternoon tea | Woven placemat + small plate | Adds texture contrast and keeps the setup light |
| Holiday dessert table | Patterned tablecloth + stacked treats | Repeats visual motifs and elevates the display |
| Ramen-and-dessert night | Deep bowl meal + mini pressed cookie finish | Keeps dessert portioned and easy after a hearty meal |
| Product | Price | Availability |
|---|---|---|
| Mini Jelly Mooncake & Cookie Press Mold Set – Floral Fondant Pastry Tool | $4.82 USD | In stock |
This usually happens when the mixture is too warm/soft (details smear) or too dry (imprint breaks). Chill briefly, use a light dusting on the stamp face, and press straight down and lift straight up for the cleanest lines.
Yes—fondant works well when it’s kneaded until pliable and smooth. Dust lightly with starch or powdered sugar, press evenly, and peel away slowly so the fine petals don’t distort.
Use minimal dusting and tap off any excess so powder doesn’t fill the grooves. If your dough is tacky, chill it a bit and keep the stamp face clean between presses to maintain crisp lines.








Leave a comment