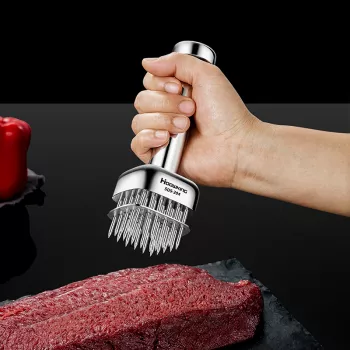
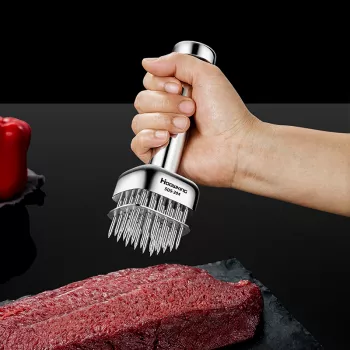
A needle-style meat tenderizer helps turn tougher cuts into more even, tender bites by creating fine channels that let seasonings penetrate and heat move through more consistently. When used with a smart technique (and solid food-safety habits), a stainless steel needle hammer can make weeknight steaks, chops, and chicken noticeably more flavorful without the mess of pounding meat flat. Below are the practical details: what it does well, what it can’t do, which foods benefit most, and how to clean it so it stays safe and long-lasting.
A needle tenderizer works by puncturing the meat with many fine needles, creating tiny pathways through the muscle. Those micro-channels change how flavor and heat move through the cut, which can improve results even if you’re not marinating for hours.
Build quality shows up in everyday use: repetitive pressing, frequent washing, and the occasional slip into a busy sink. That’s where 304 stainless steel earns its reputation in the kitchen.
Needle tenderizing is most useful on lean, tight-grained, or thicker pieces where seasoning and heat benefit from a head start. It’s also handy when you don’t have time for a long marinade.
| Food | How many passes | Pressure | Notes |
|---|---|---|---|
| Thick beef steaks (round/chuck) | 2–4 passes per side | Medium-firm | Aim for even coverage; avoid edges to reduce tearing. |
| Flank/skirt | 1–3 passes per side | Medium | Tenderize lightly; slice across the grain after cooking. |
| Pork chops (thick-cut) | 1–2 passes per side | Light-medium | Finish with a short rest so juices redistribute. |
| Chicken breast (thick end) | 1–2 passes on thick areas | Light | Keep cold; cook promptly and to safe temperature. |
| Firm tofu | 1–2 passes per side | Light | Helps marinades penetrate; press tofu first for best uptake. |
A needle hammer is straightforward, but a few small habits keep things cleaner and prevent the “mushy” texture that comes from overdoing it.
If you want a compact tool that fits into everyday prep—grilling, pan-searing, roasting, or meal prep—a stainless needle hammer is a practical upgrade. The Premium 304 Stainless Steel Meat Tenderizer Needle Hammer is designed for repeated use, quick cleanup, and consistent perforation to speed up marinade absorption and improve bite on tougher cuts. It’s currently listed at $43.51 (USD).
To round out the meal, serve sliced steak or soy-ginger chicken in a Handmade Ceramic Noodle Bowl – Creative Round Ramen Soup Deep Bowl, or set the table with a Bohemian Ethnic Cotton Linen Geometric Tablecloth for Dining & Coffee Tables for an easy, polished finish.
It can if overused. Stick to light, even passes and stop once the surface is evenly perforated, avoiding repeated hits in the same spot—especially on thinner cuts.
It can be safe when handled properly, but puncturing can move surface bacteria inward. Keep tools and surfaces clean, avoid cross-contamination, and cook to safe internal temperatures using reliable food-safety guidance.
Rinse immediately, wash with hot soapy water, and use a small brush around needle openings. Inspect for trapped residue, dry completely, and store with the needle side protected.










Leave a comment