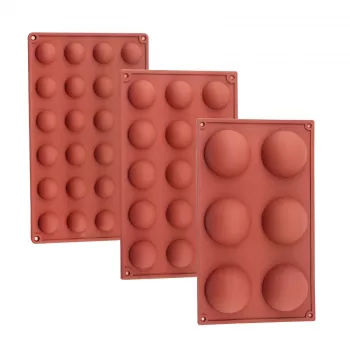
3D Round Half Sphere Silicone Mold Set: Smooth Domes Made Simple
Neat half-spheres turn everyday treats and handmade projects into “how did you make that?” moments—without specialty equipment. Our 3D Round Half Sphere Silicone Mold Set for Chocolate, Candles & Baking is designed for clean releases and repeatable shapes, so chocolate bombs, mousse domes, mini cakes, and even poured wax pieces come out rounded and polished. Use it for weekend baking, party prep, or small-batch gifting when a consistent dome shape makes everything look professionally finished.
What this mold set is best at
- Chocolate domes for filled truffles, hot cocoa bombs, or layered shells
- Dessert domes for mousse, panna cotta, jelly, ice cream, and semifreddo (freeze-and-pop convenience)
- Baking projects like mini cakes, sponge domes, and molded brownie bites when a rounded top matters
- Craft pours such as wax melts or small decorative candles when paired with the right wax and wick setup
- Batch consistency: make multiples that match in size and shape for plating, packaging, and gifting
Popular uses and what to pour
| Project |
Best pour/mixture |
Helpful tip |
| Chocolate shells |
Tempered chocolate or compound coating |
Tap the mold to release bubbles and chill briefly for a crisp release |
| Mousse domes |
Set mousse or whipped ganache |
Freeze before unmolding for sharp edges and easy handling |
| Baked domes |
Cake batter (not overfilled) |
Place on a stable tray for safe oven transfers |
| Wax projects |
Candle wax suited to molds |
Warm the mold slightly to reduce sink marks; allow full cure before unmolding |
Why half-spheres elevate desserts (and save time)
- Fast assembly: two halves become a full sphere for chocolate bombs or filled “surprise” centers
- Cleaner presentation: domes plate beautifully—add glaze, cocoa powder, sprinkles, or a drizzle and they look bakery-ready
- Portion control: repeatable shapes help keep servings consistent for parties and prep
- Easy layering: build shells, add fillings, then seal—ideal for truffles, ice cream inserts, and multi-texture desserts
- Less trimming: a well-released dome needs minimal touch-up compared with hand-shaped rounds
Chocolate domes that release cleanly: a practical workflow
- Prep the mold: Make sure it’s completely dry and free of grease or dust; even tiny water droplets can cause chocolate to seize or spot.
- Create the shell: Spoon in melted chocolate (tempered for best snap), rotate to coat, then invert to let excess drip off; scrape the rim for tidy edges.
- Set with control: Chill only until set—over-chilling can invite condensation later, which may dull the finish.
- Fill and seal: Add fillings (marshmallows, ganache, caramel, crisp pearls), warm a plate or pan briefly, then melt the rim of each half to seal into a sphere.
- Finish like a pro: Roll the seam in sprinkles, drizzle with contrasting chocolate, or dust with cocoa.
Troubleshooting quick fixes
| If you see… |
Likely cause |
Fix |
| Thin spots |
Not enough coating or uneven rotation |
Add a second thin coat after the first sets |
| Bubbles |
Trapped air in chocolate |
Tap mold firmly on the counter before chilling |
| Ragged edges |
Excess chocolate left on rim |
Scrape the rim with a straight edge before setting |
| Dull finish |
Condensation after chilling |
Unmold when set; avoid long fridge time; keep room dry |
From freezer to plate: mousse, jelly, and ice cream domes
- Freeze-first strategy: Many dome desserts unmold best when fully frozen; silicone flex helps release without cracking.
- Layered builds: Add an insert (cookie, fruit gel, brownie round), then fill with mousse; freeze and glaze for a smooth finish.
- Quick plated desserts: Pop out a dome, add sauce and crunch, and serve immediately for a restaurant-style look.
- Storage tip: Once unmolded, keep domes covered in the freezer to prevent frost and odor pickup.
Using the mold for candles and wax crafts (clean shapes, careful setup)
- Mold-friendly wax matters: Choose a wax designed for molds for best release and surface finish.
- Wick planning: Secure the wick straight and centered before pouring; a stable setup prevents crooked burns.
- Pouring technique: Pour at a suitable temperature for the wax type; allow a full cure before unmolding to reduce dents and fingerprints.
- Safe work habits: Protect surfaces, keep heat tools attended, and follow wax and fragrance supplier guidance for temperatures and load limits.
For general safety reminders while burning candles, we recommend reviewing guidance from the National Candle Association — Candle Fire Safety.
Care, cleanup, and storage for long-lasting results
If you like digging into material regulations for food-contact rubber articles, the FDA 21 CFR 177.2600 reference is a helpful starting point.
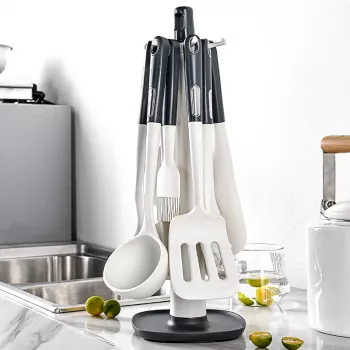
Complete the setup: serving and gifting add-ons that pair well
FAQ
Do chocolate domes need tempering to work in silicone molds?
Tempering isn’t required, but it noticeably improves shine, snap, and clean release. If you want the simplest route, compound coating works well; just keep tools bone-dry and don’t over-chill so you avoid condensation dulling the surface.
Can the same mold be used for both food and candle wax?
Our team recommends dedicating one mold to food and a separate one to wax crafts whenever possible. Fragrance oils and dyes can linger in silicone, so keeping them separate (and stored separately) helps protect flavor and scent integrity.
How do you prevent bubbles in chocolate or mousse domes?
Tap the filled mold firmly on the counter to bring bubbles to the surface, and fill slowly so air doesn’t get trapped. For mousse, piping from a bag and smoothing the top before freezing helps minimize pockets and pitting.
Recommended for you











Leave a comment